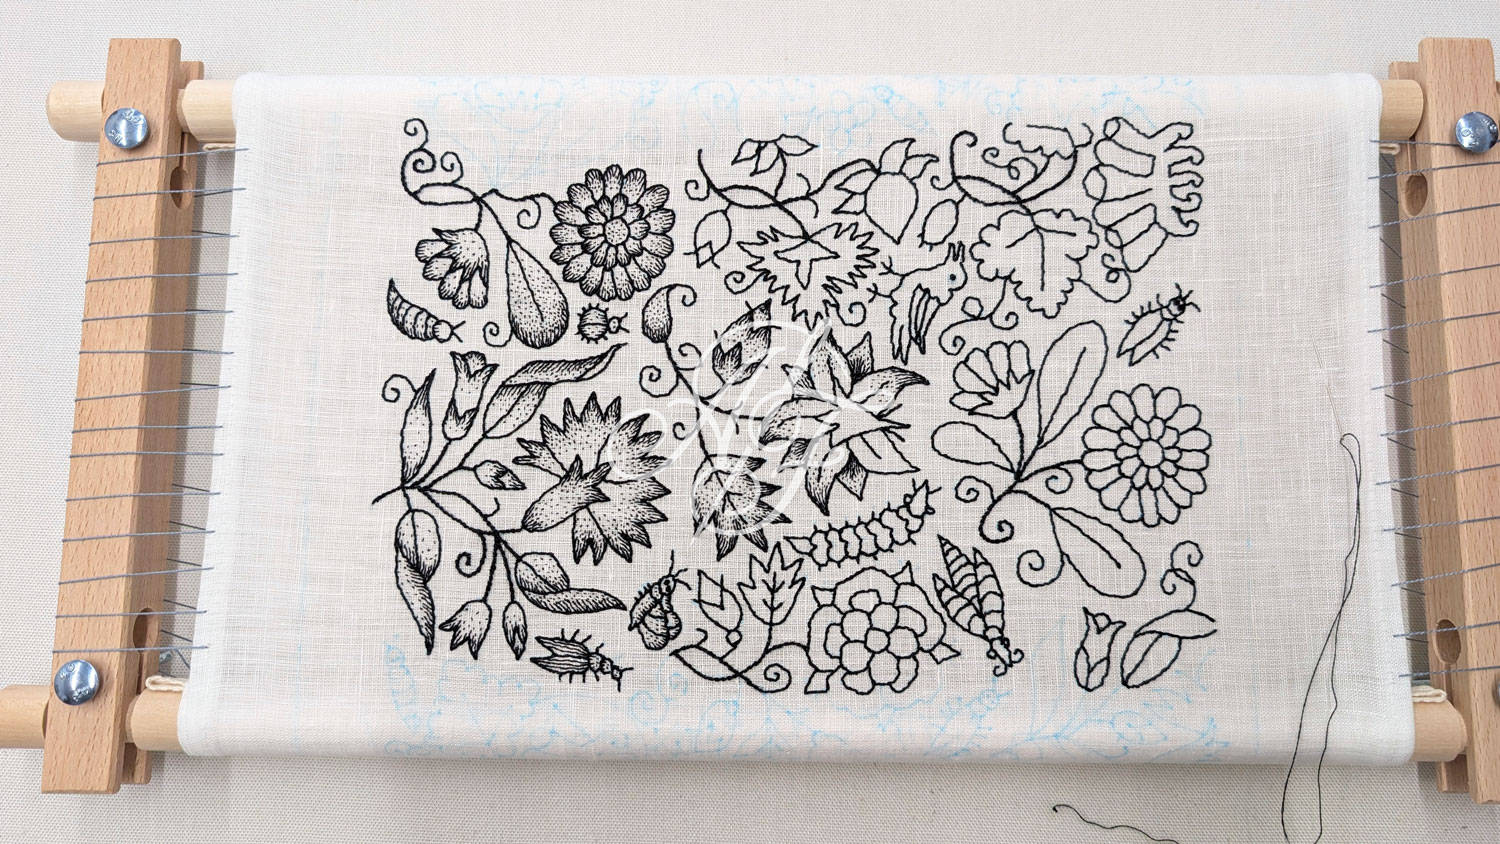
I've long been obsessed with late Elizabethan and Jacobean blackwork embroidered coifs! I couldn't explain exactly why, but something about the swooping patterns of geometric and freeform flora and fauna has always inspired me. I've finally decided, what the hell, let's just do it! After several experiments with shaping and fit of plain linen coifs and 2 small blackwork samplers, I have a pattern I'm finally happy with, so I've decided to proceed to the final garment.
A note: This blog post will be updated as a WIP, so please check back every few weeks for updates! The project begun in August 2026 with sampling and prep work, and I began embroidering in early October 2026.
Current Project Timeline
- Cutting, preparing linen, and framing: 1 hour
- Tracing designs: 0.5 hours
- Embroidering outlines: 14 hours
- Embroidering fillwork: 7 hours
- Project total: 22.5 hours (so far!)
Inspiration: "The Unstitched Coif"
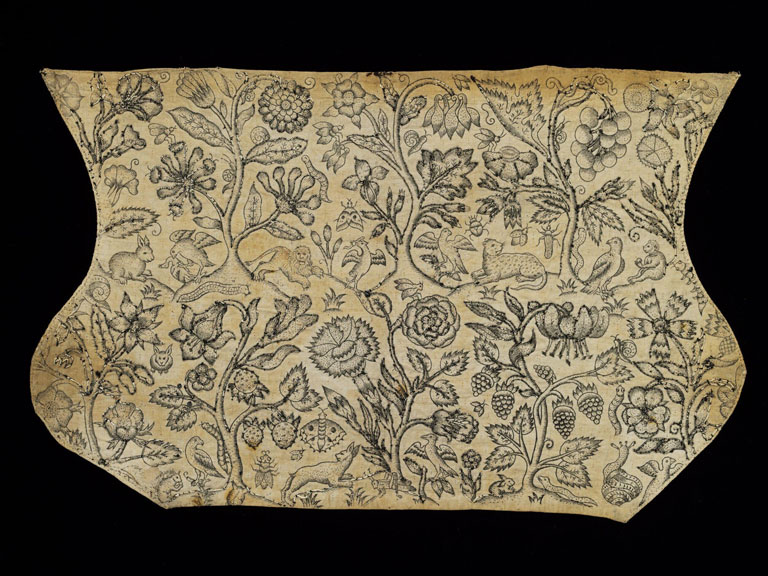
This particular design is taken from an extant piece c.1600-1630 at the V&A Museum in London, a panel drawn in blue ink where the blackwork stitching has almost completely disintegrated. The remaining ink is so clearly visible still, though, that the V&A embarked on an ambitious project to enlist modern embroiderers to create their own imagined replicas of the original design: The Unstitched Coif Project, headed by Toni Buckby. (There is a free download of the complete design available on the project website.)
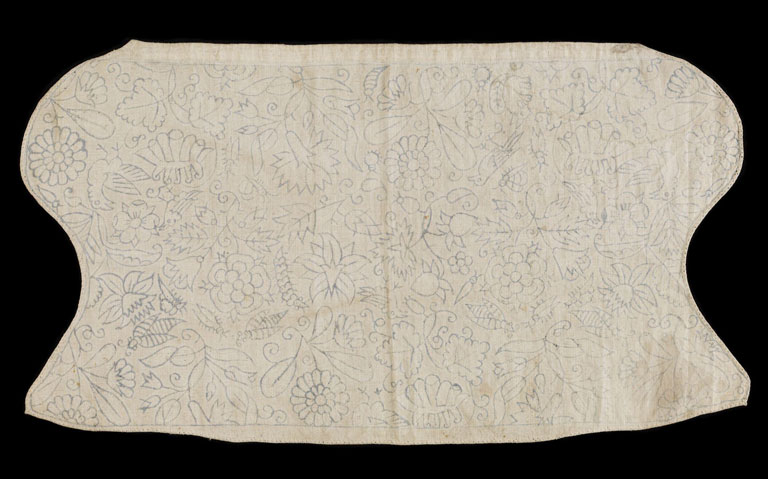
While I was too late in discovering the project to participate officially, I decided there's no harm in creating my own now! I made some changes to the original design, including scaling it up to 112% to fit my size of coif, slightly shifting the patterns to fit my desired face edge shape, and adding a few cheeky extra worms in the blank spaces. (Who doesn't love an extra cheeky worm?) My version is embroidered in black cotton thread onto 130gsm linen from Merchant and Mills, and I plan to fully line it in the same to hide all of the stitching and keep the inside tidy. This linen quite fine for modern linen at about 46 threads per inch, which would be comparable to the stitch count of middling-quality period linens. (High quality period linens would be closer to the range of 80-100 threads per inch.)
Toile and samplers
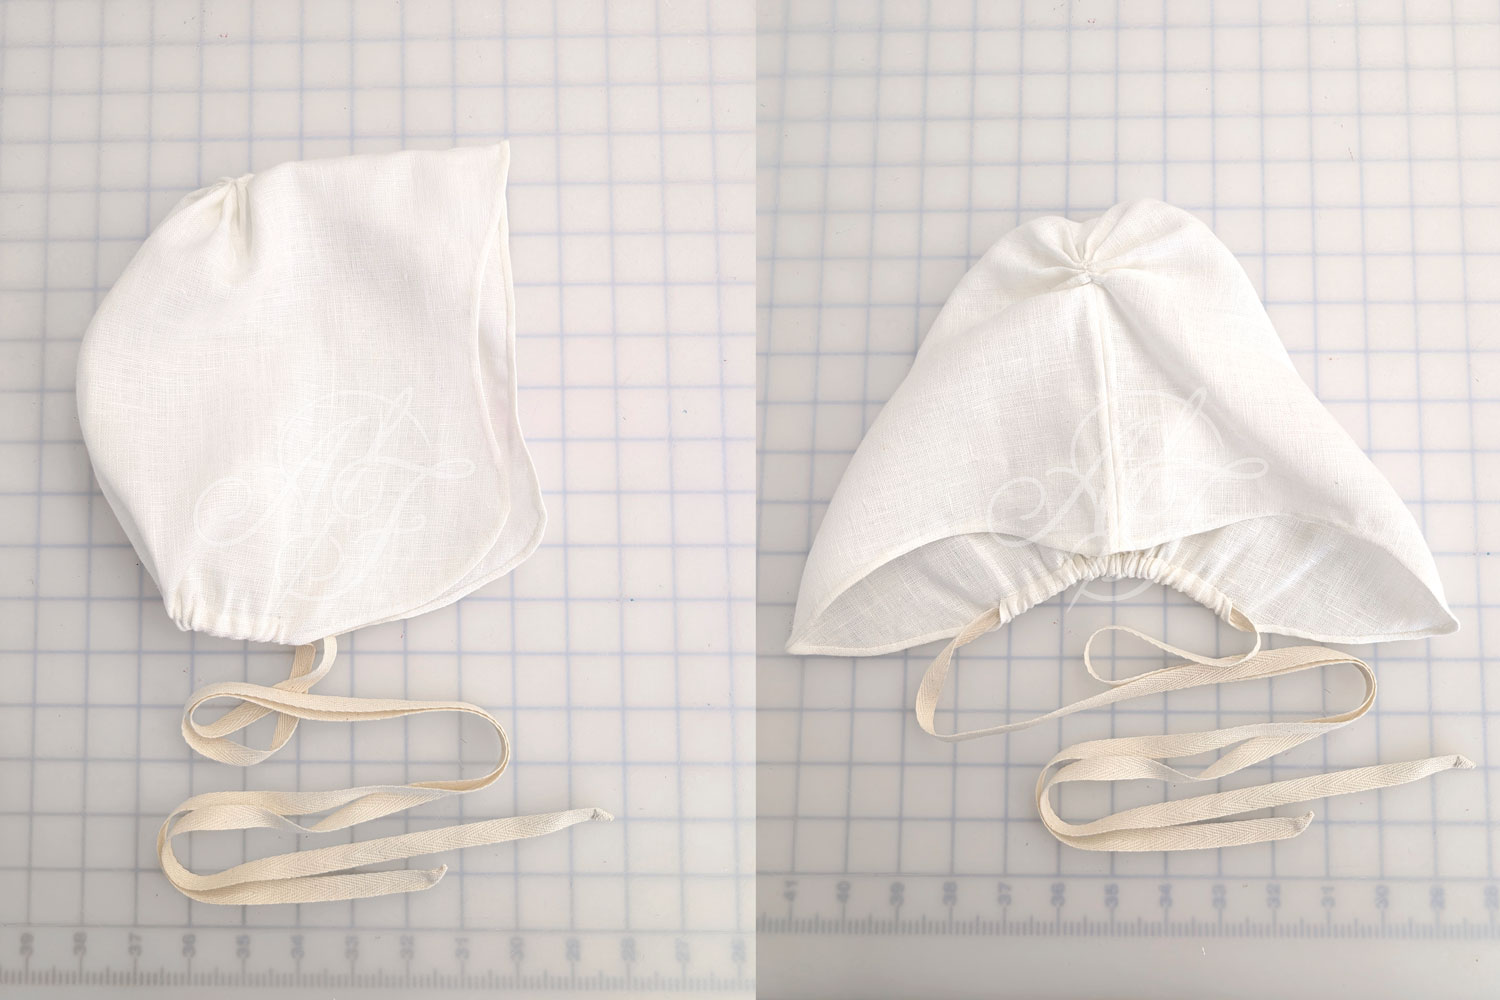
Before beginning on the final garment, I created multiple samples to ensure I have a solid plan. The first was to make a toile of a plain linen coif to get the right fit for my own head. I developed the final shape based on a few extant coifs and my best judgement, and ended up with a shape that covers my hairline sufficiently and feels snug and comfortable when worn.
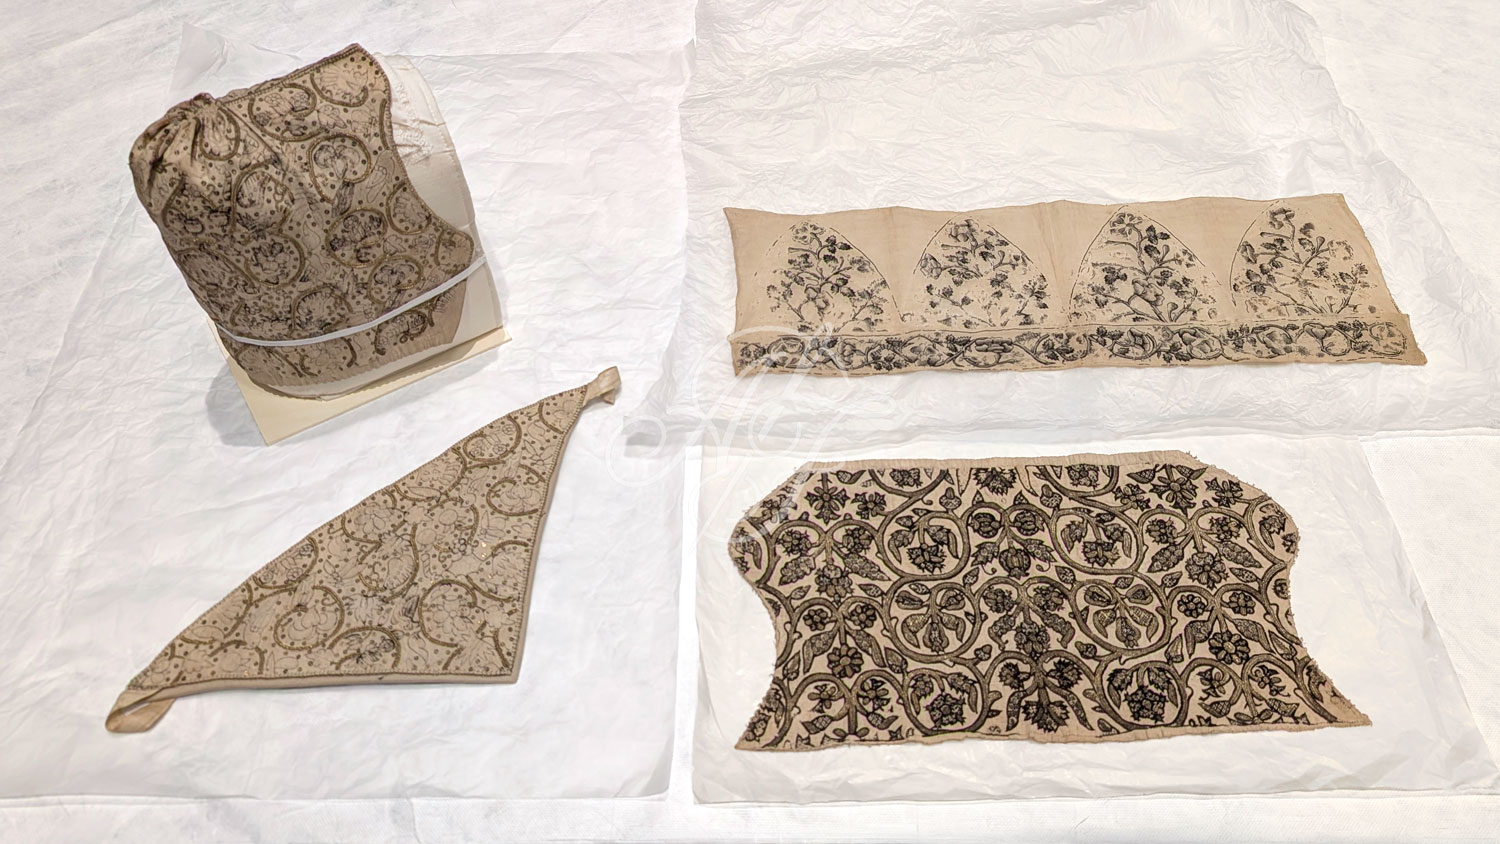
I also embarked on a research trip to the Victoria and Albert Museum's East Storehouse as a part of their Order an Object Service, to study many examples of blackwork embroidery on extant garments. What an absolute treat! I have another blog post with many beautiful photos and details of those pieces here: Research at the V&A: Blackwork. This was so helpful for me to fully understand the techniques and scale that I would be working in. While I was comforted to discover that the reverse side of the embroidery done by professionals in this era was also messy (often very much so!), it was a strong ego check to see how tiny their stitches were! Mine for this project will not compare, as I truly do not have all year to focus on one single project, but I'll try to keep that scale in mind regardless!
I then made 2 small samplers of 2 types of blackwork embroidery, using actual motifs from the Unstitched Coif design. The first uses a combination of stem stitch, Holbein stitch / double running stitch, and filled in designs in various counted thread patterns. The second uses stem stitch, Holbein stitch, and shaded infill with seed stitch and running stitches. I also experimented with thread types, using a single strand of DMC cotton for filling in and eventually settling on #8 perle cotton for outlines.
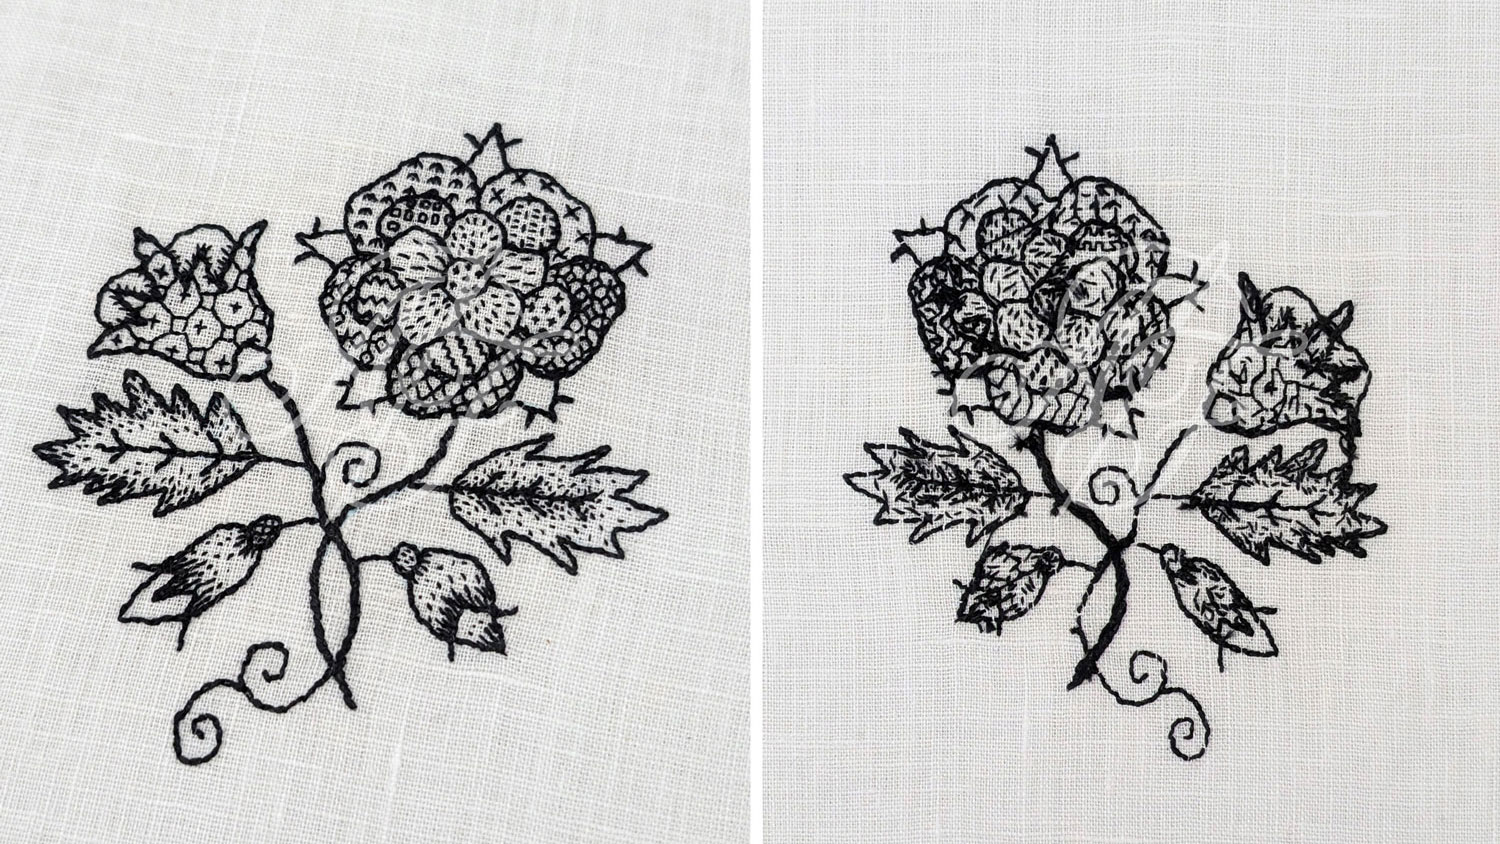
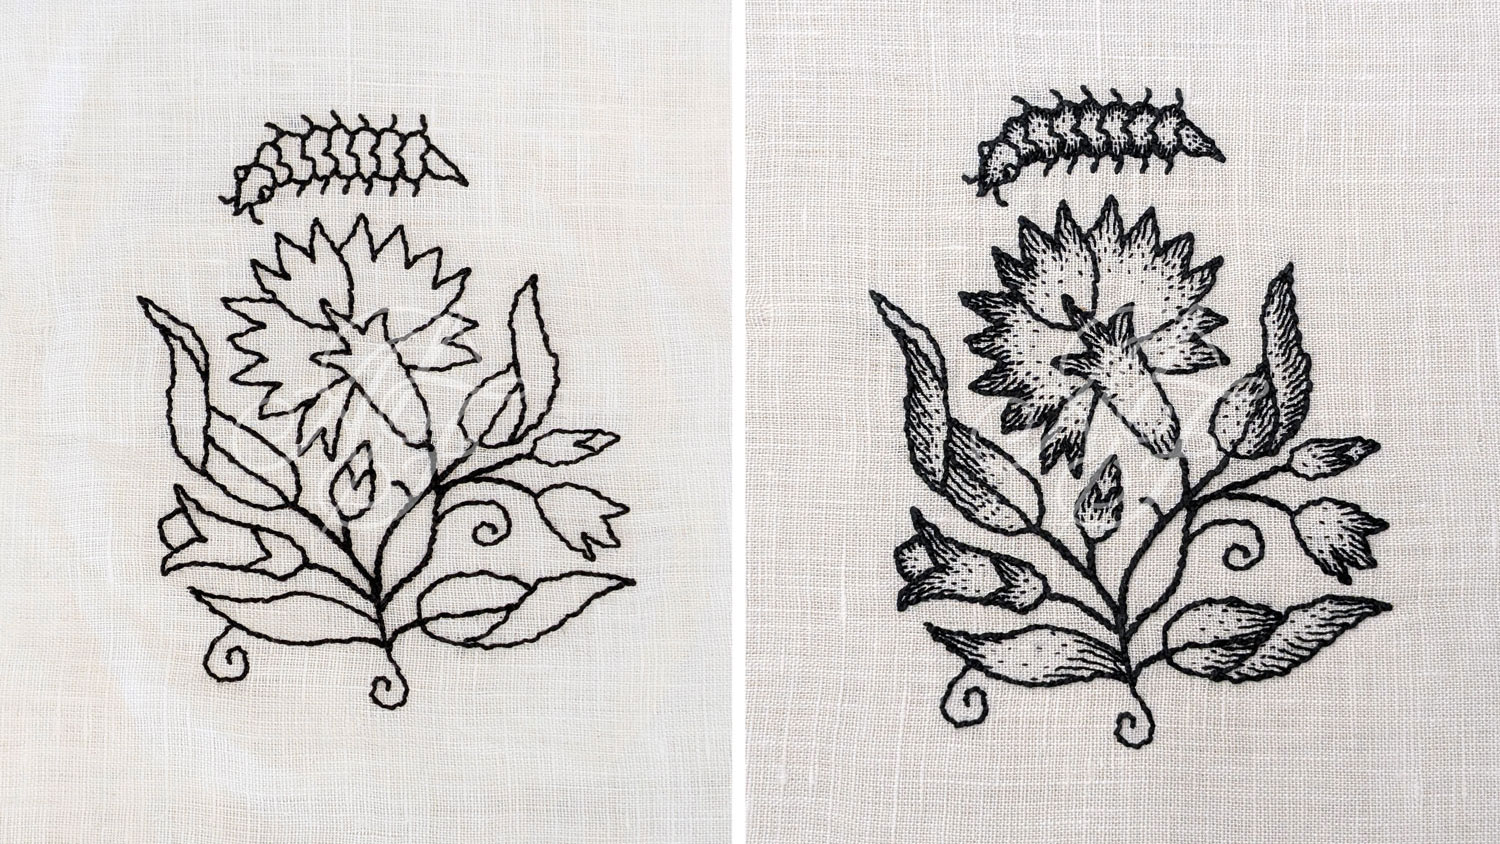
In the end, I decided to opt for the latter in the final design. This is due to the date of the original coif being estimated between 1600 and 1630, when shaded and more natural designs gained popularity, and also some slight evidence of shaded stitches on the original. On the original, most thread has completely disintegrated, leaving primarily the outline stitches visible, so it's impossible to know for sure, but this is my best guess!
Preparing the linen and frame
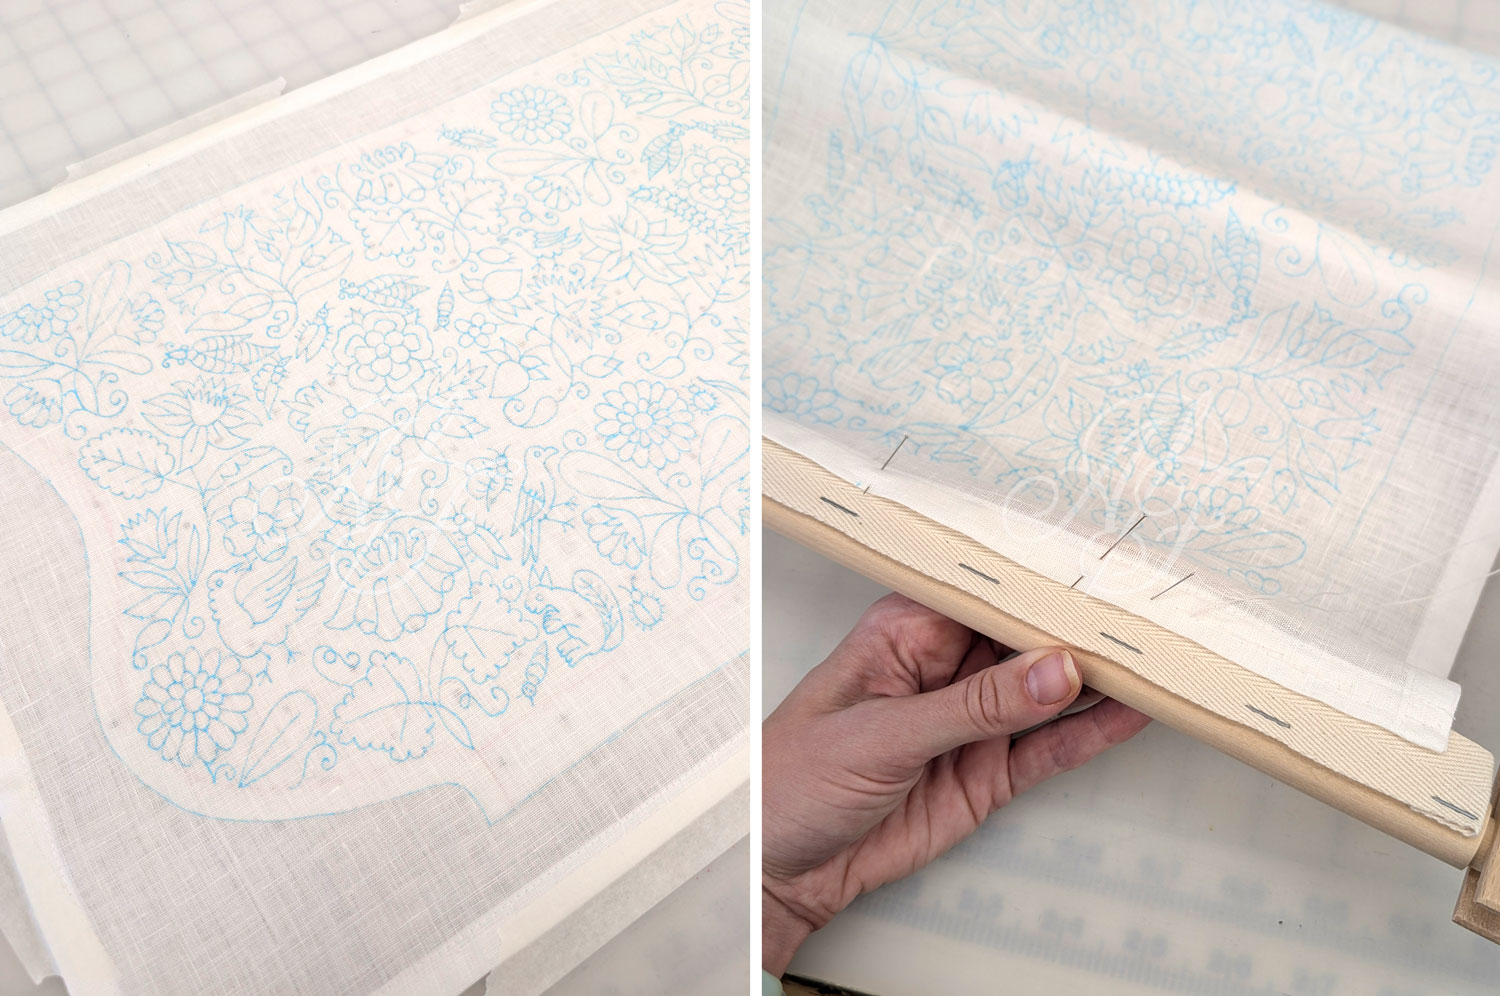
Then it's time to prepare the linen by pre-washing, restoring the grain, marking out the final design in pen, and setting up the embroidery frame. Fortunately for me, with white (partly translucent) linen and a black inked paper design, it was very easy to transfer the design accurately. With thicker linen, I would have needed a light table or a lot more patience with a well-lit window!
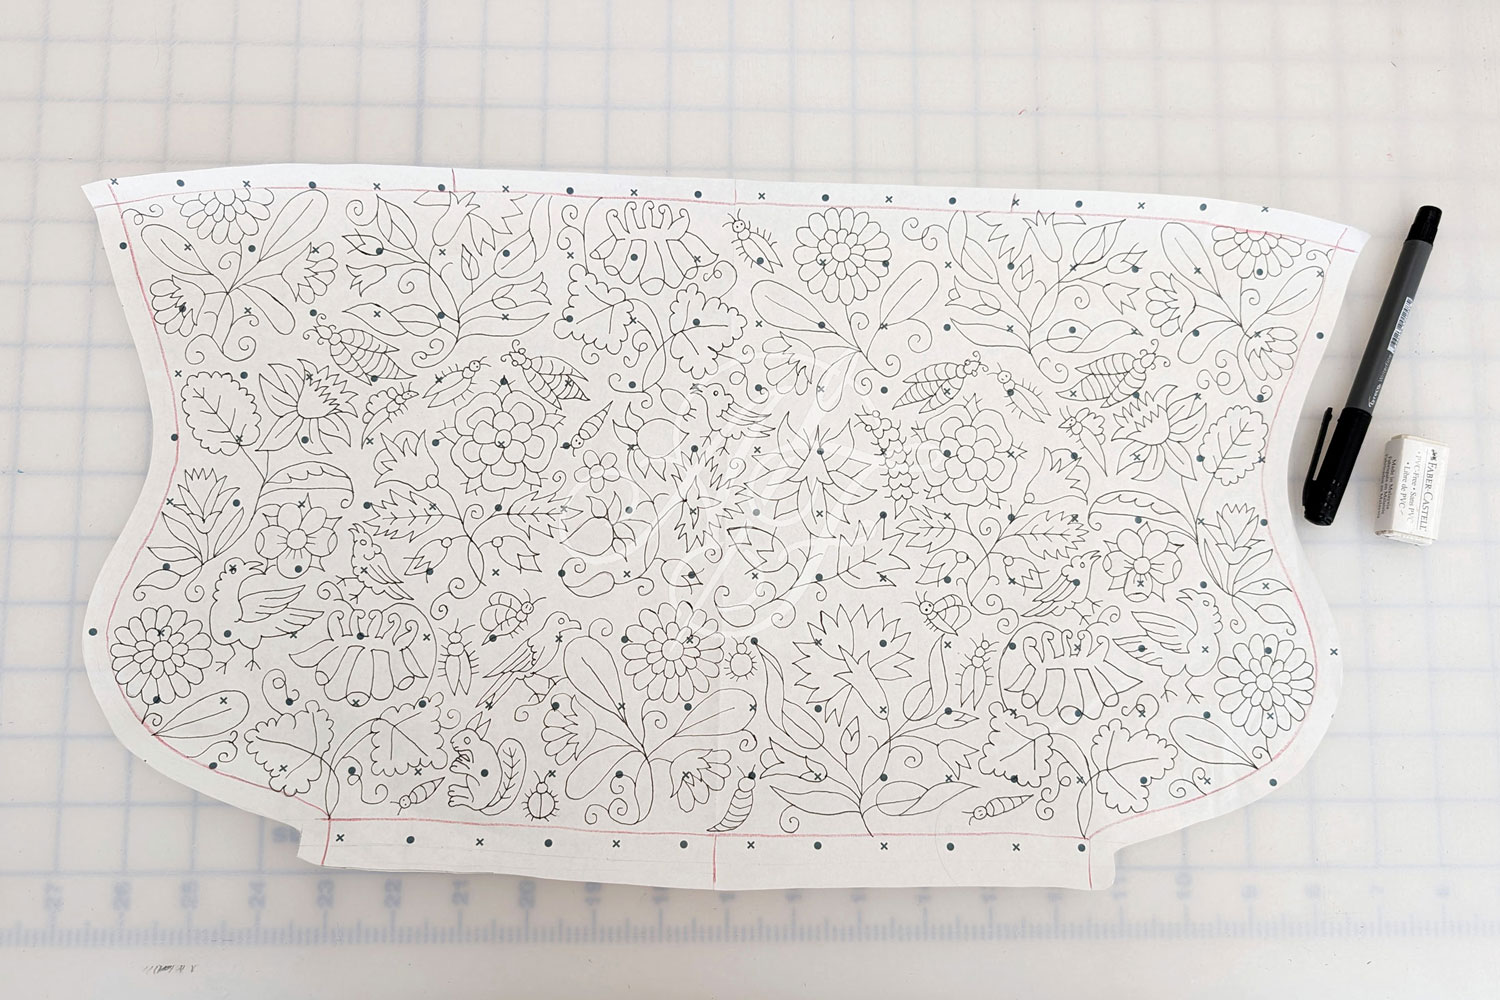
I originally planned to transfer using a rub-off / iron-off frixion pen, because it draws so smoothly for very thin lines. But it did occur to me that I might someday want to wear it in cool weather, and I couldn't take the risk of a bit of red pen showing around my embroidery! So I changed my mind and switched to a fine-tip Clover washable pen, which I tested numerous times for washability.
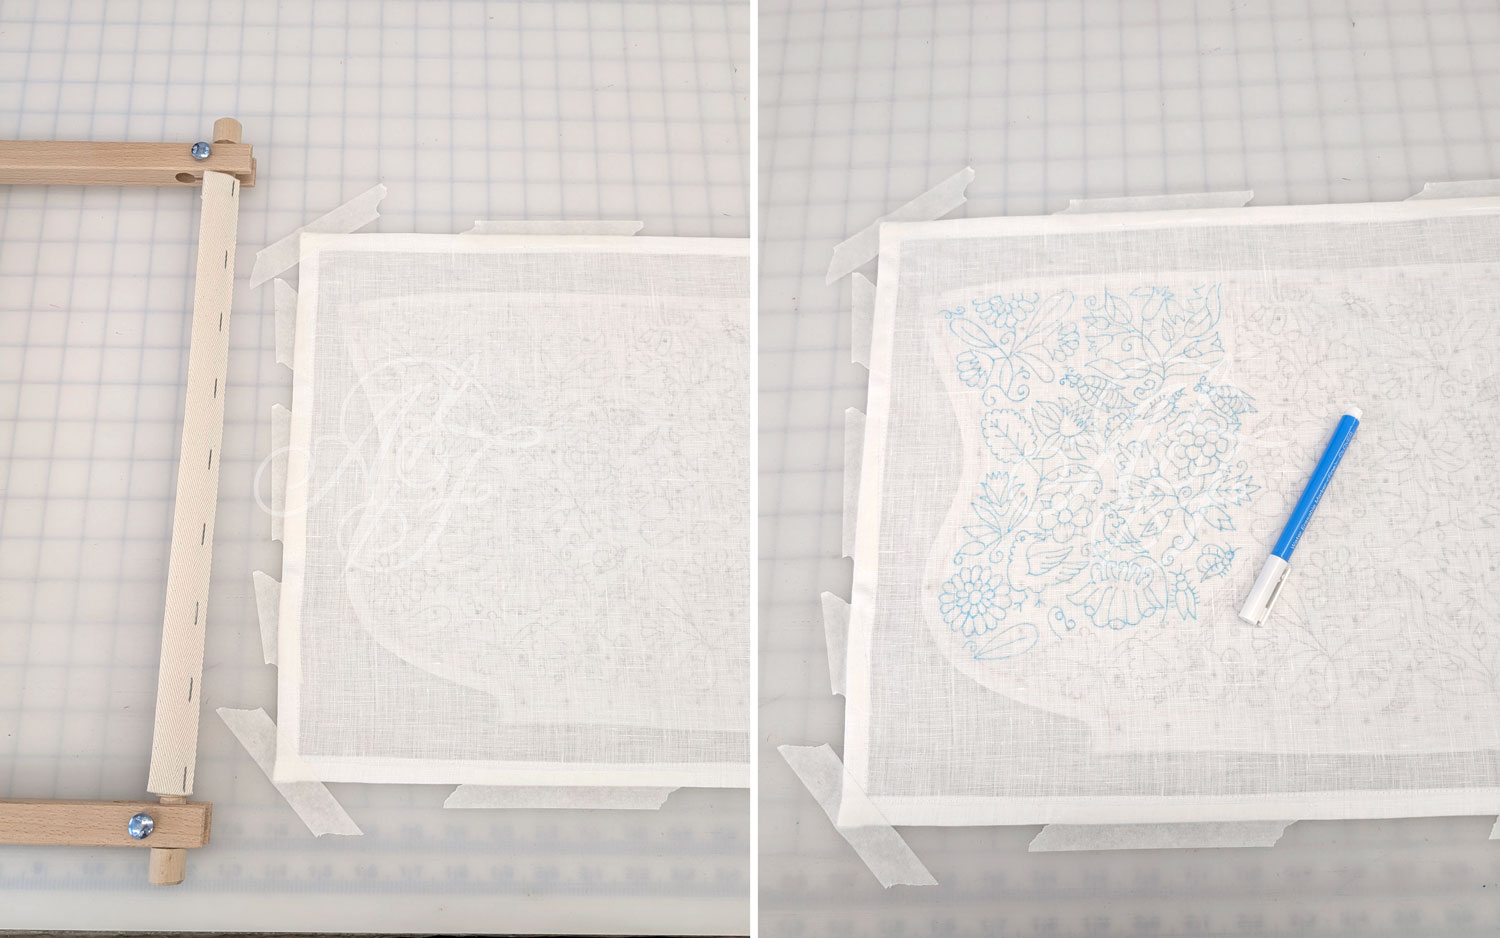
To prepare for tracing, I cut my linen rectangle 2-3" longer than the final design on each side, and then pressed and stitched under the seam allowances. The 2 short sides are sewn with twill tape to give me something stable to sew onto the rotating frame tapes. When the embroidery is done and washed, the sewn shape will also make it easier to iron back into a perfectly trued rectangle before cutting it down to the final coif shape.
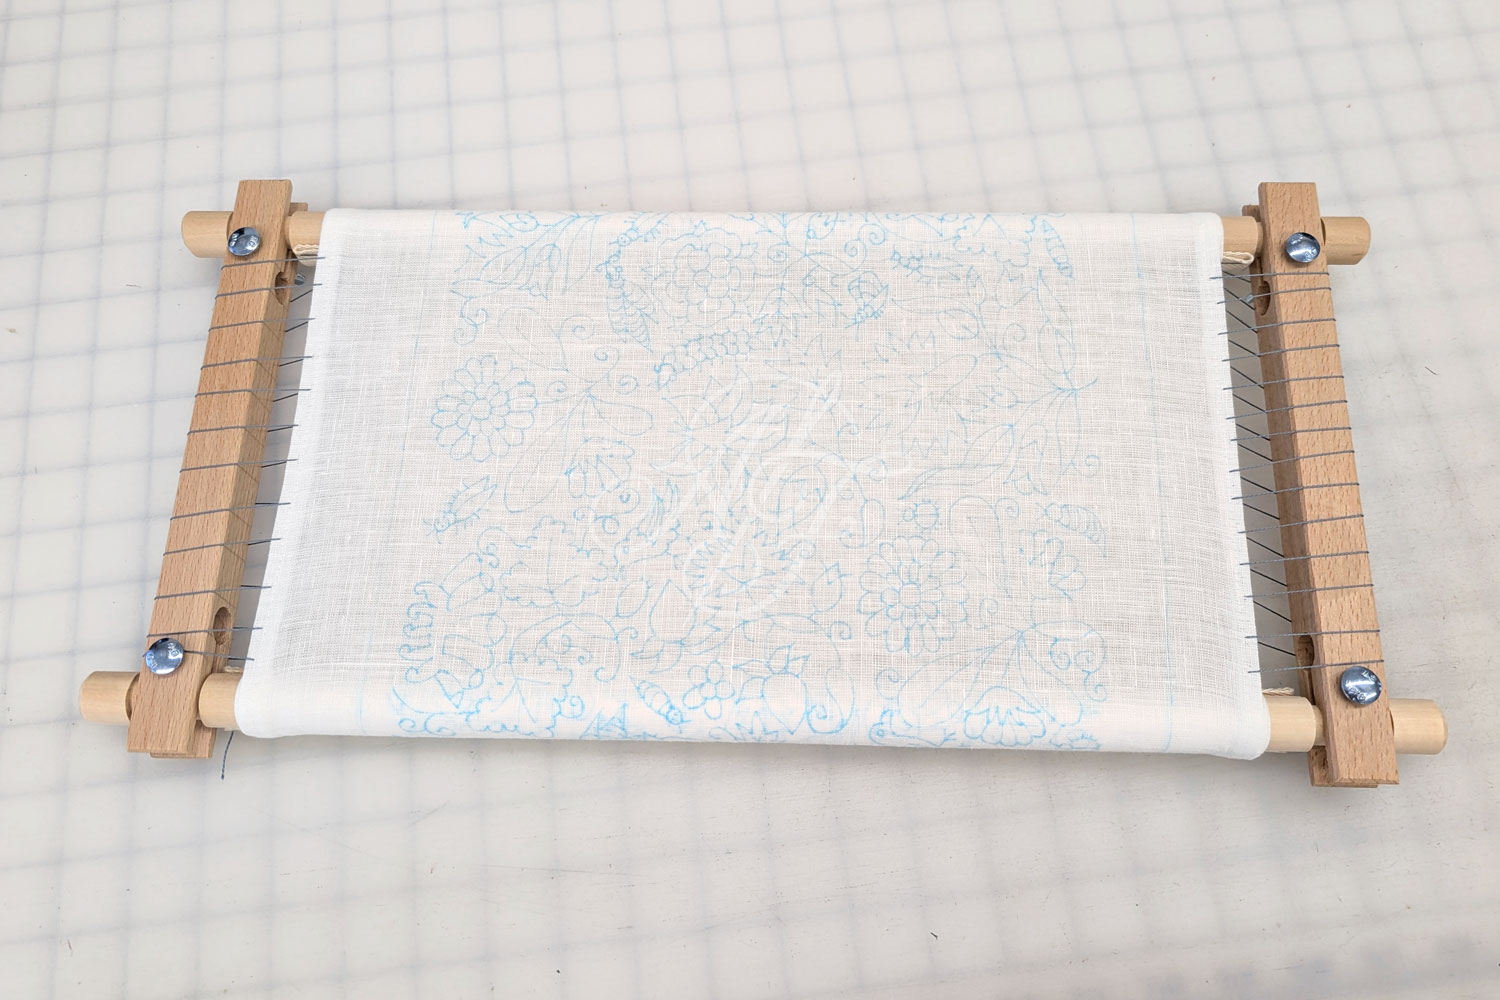
Next the linen is stretched onto the rotating frame or slate frame, longways. The twill tape ends are sewn with a large back stitch to the twill on the frame, and rotated to show the middle, where I'll begin my embroidery.
Embroidery!
After almost a month of research, designing, toiles and samplers, and planning, the project is now ready to begin. I decided to focus on outlining alone for the entire visible section, and then to come back through after to add the full section's shading and filling in. I think this will help me with speed to only work on one type of embroidery at a time... I am trying to accurately document how long everything takes, and it's my goal to complete the outlining in 75 hours. We'll see how close I can get to that by the end of the project!
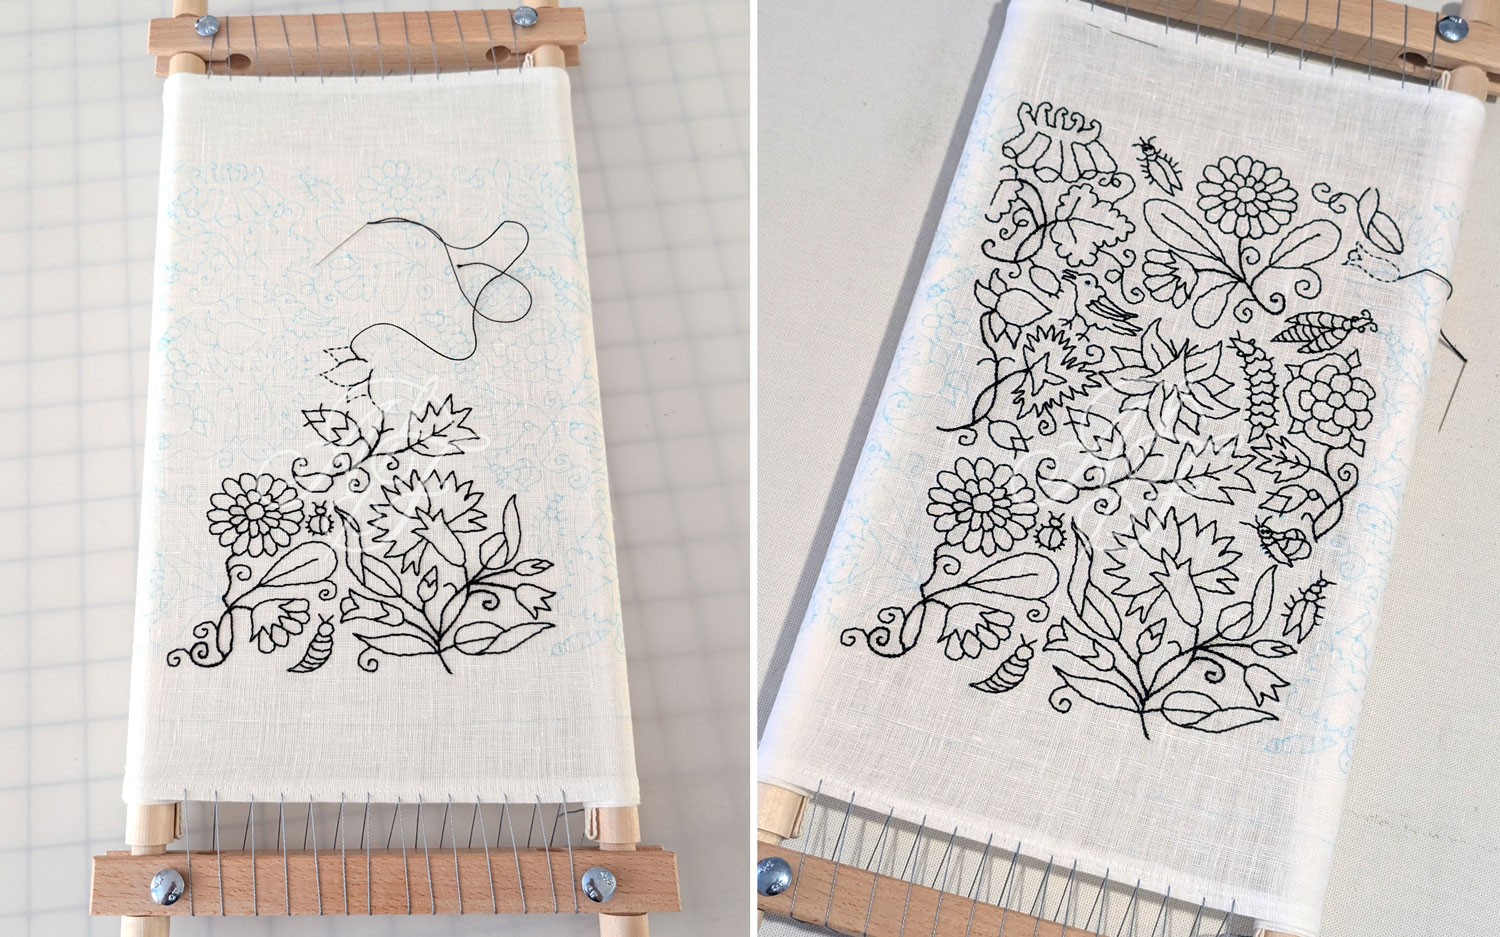
Moving onto fillwork! I decided to take the late Elizabethan / early Jacobean approach of doing fillwork in a more naturalistic, shaded style rather than the earlier techniques of geometric fill patterns. This seems appropriate for the estimated dates of the original coif, and also visually looks right to me within the outlines. I've done plenty of practice and now feel more or less comfortable with creating shading using a combination of running stitches and seed stitches. The only difficult part is making the transition from dense stitches into dispersed stitches look natural and free-flowing and not overly formulaic. This is why I started at the back of the coif near the middle bottom, where the designs will be heavily gathered up at the nape and less noticeable. My hope is that by the time I get to the front and more important sections, I'll be better at this!
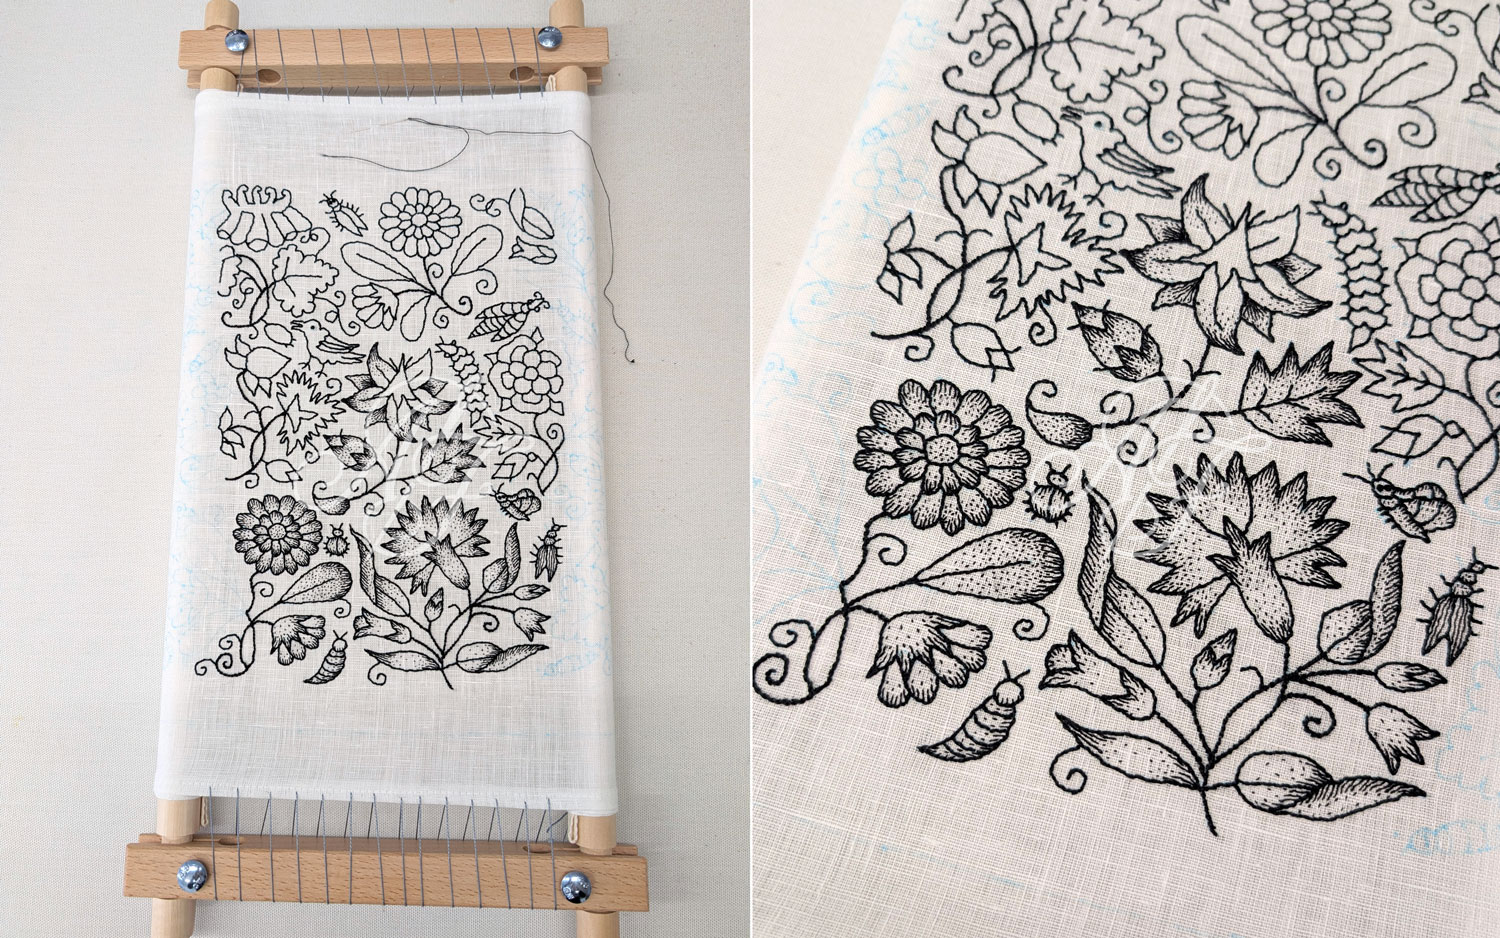
This is as far as I've gotten as of October 18, 2026. This blog post will continue to be updated with my progress as I go, so please check back soon for more.